Key Stage 4 Target Setting
- 4 Minutes to read
- Print
- DarkLight
- PDF
Key Stage 4 Target Setting
- 4 Minutes to read
- Print
- DarkLight
- PDF
Article summary
Did you find this summary helpful?
Thank you for your feedback!
You can use the ProgressTeaching platform to generate tailored targets for your students in Years 7-11
Key Stage 2 data
Prior to generating targets, ensure that all students have either validated or estimated Key Stage 2 data.
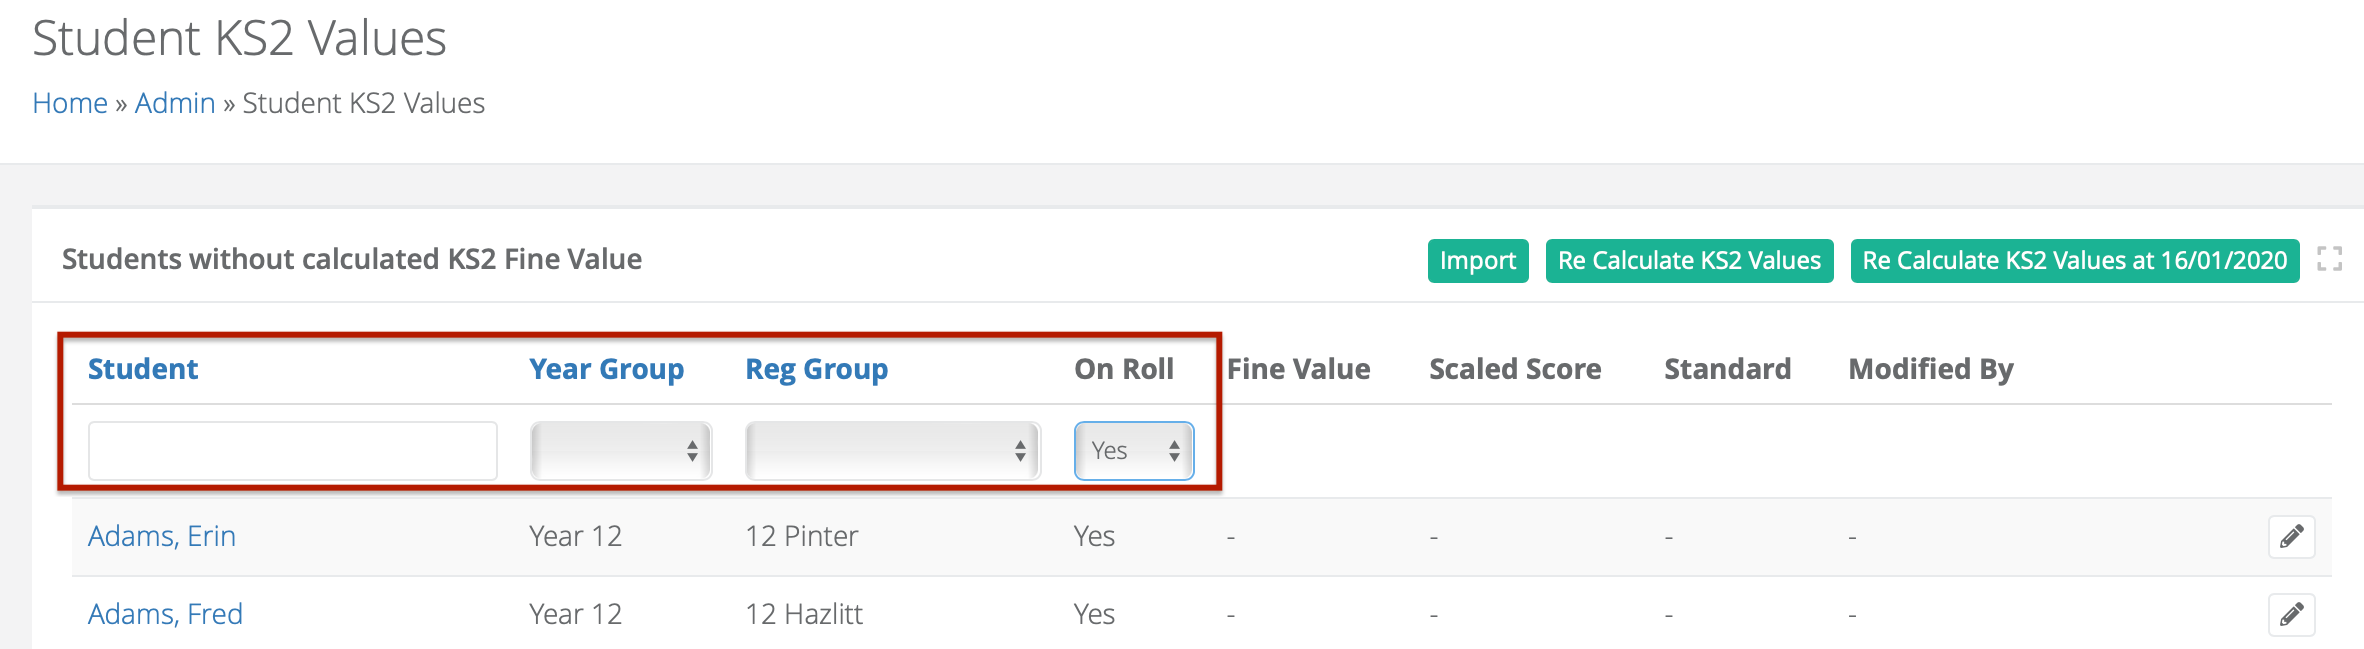
You can check to see which of your students are missing Key Stage 2 data by navigating to Admin > Progress > Student KS2 Values
The first table on this page, entitled 'Students without calculated KS2 fine value', shows you which students do not yet have Key Stage 2 prior data entered into the platform. This table can be filtered by student, year group, registration group or on/off roll.
If you are bulk uploading Key Stage 2 prior data, follow the importing process detailed here.
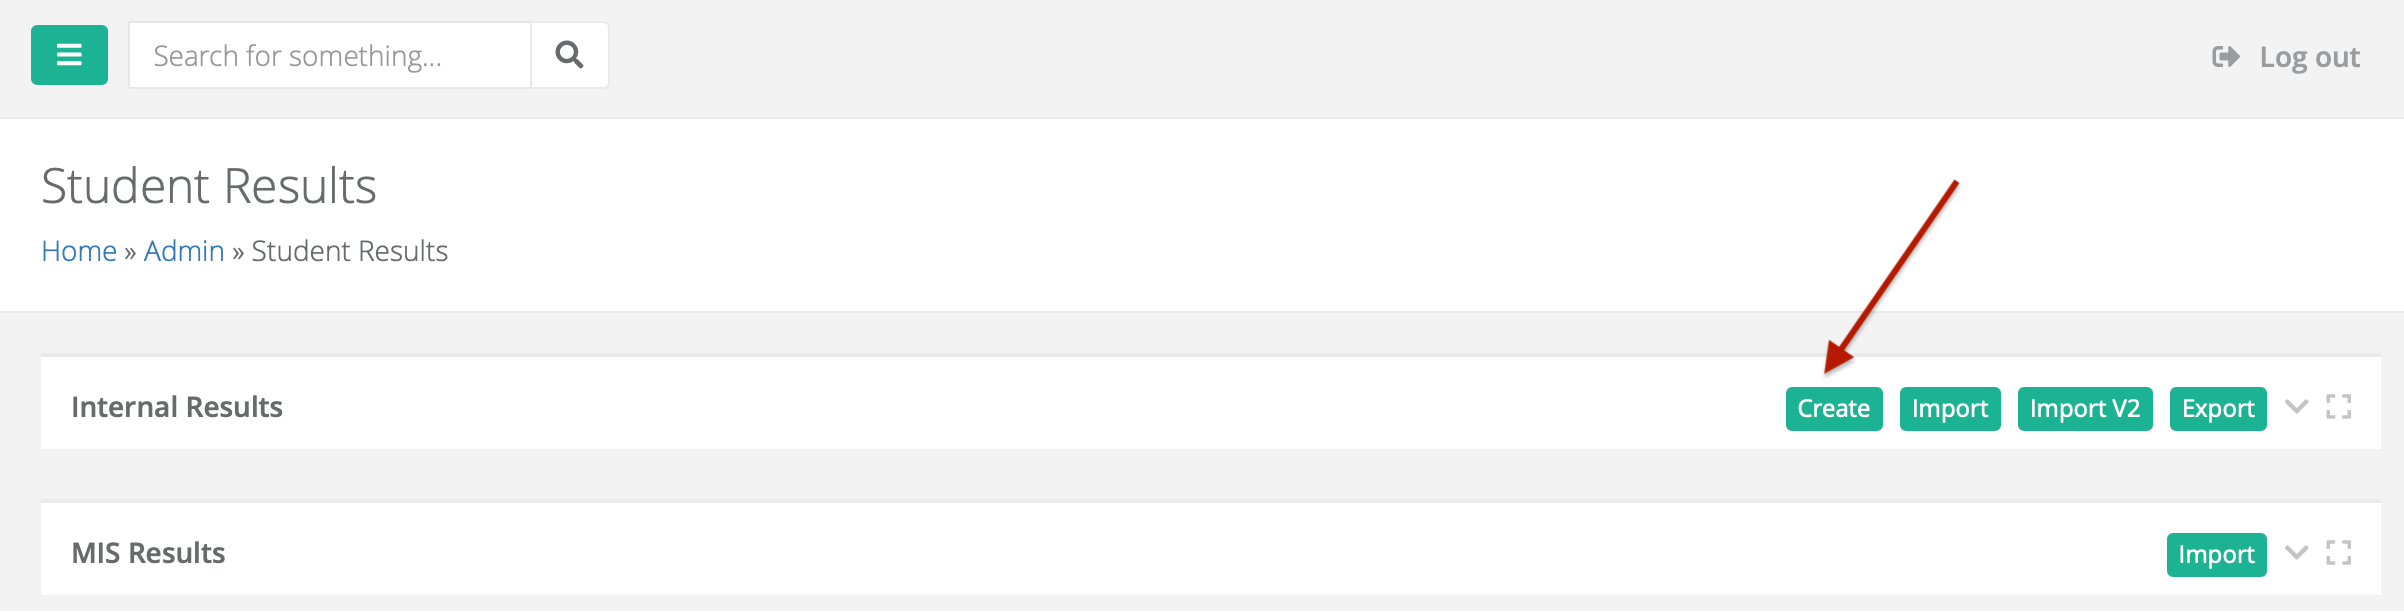
If you are adding information for a small number of students or just one student, navigate to Admin > Progress > Student Result
Now click on the 'Create' button.
To add an individual student's Key Stage 2 data to the platform, enter the following details:
- The student's name
- The aspects you want to store the data in. You will have to carry out this process twice - once for the Maths scaled score and once for the Reading scaled score. Use these aspects:
- "KS2 Maths Scaled Score"
- "KS2 Reading Scaled Score"
- The correct Result Set. Choose the relevant Result Set from these two options:
- "KS2 Validated"
- "KS2 Estimated"
- A valid Key Stage scaled score e.g. 108
- The start date of the current academic year e.g. 01/09/2023
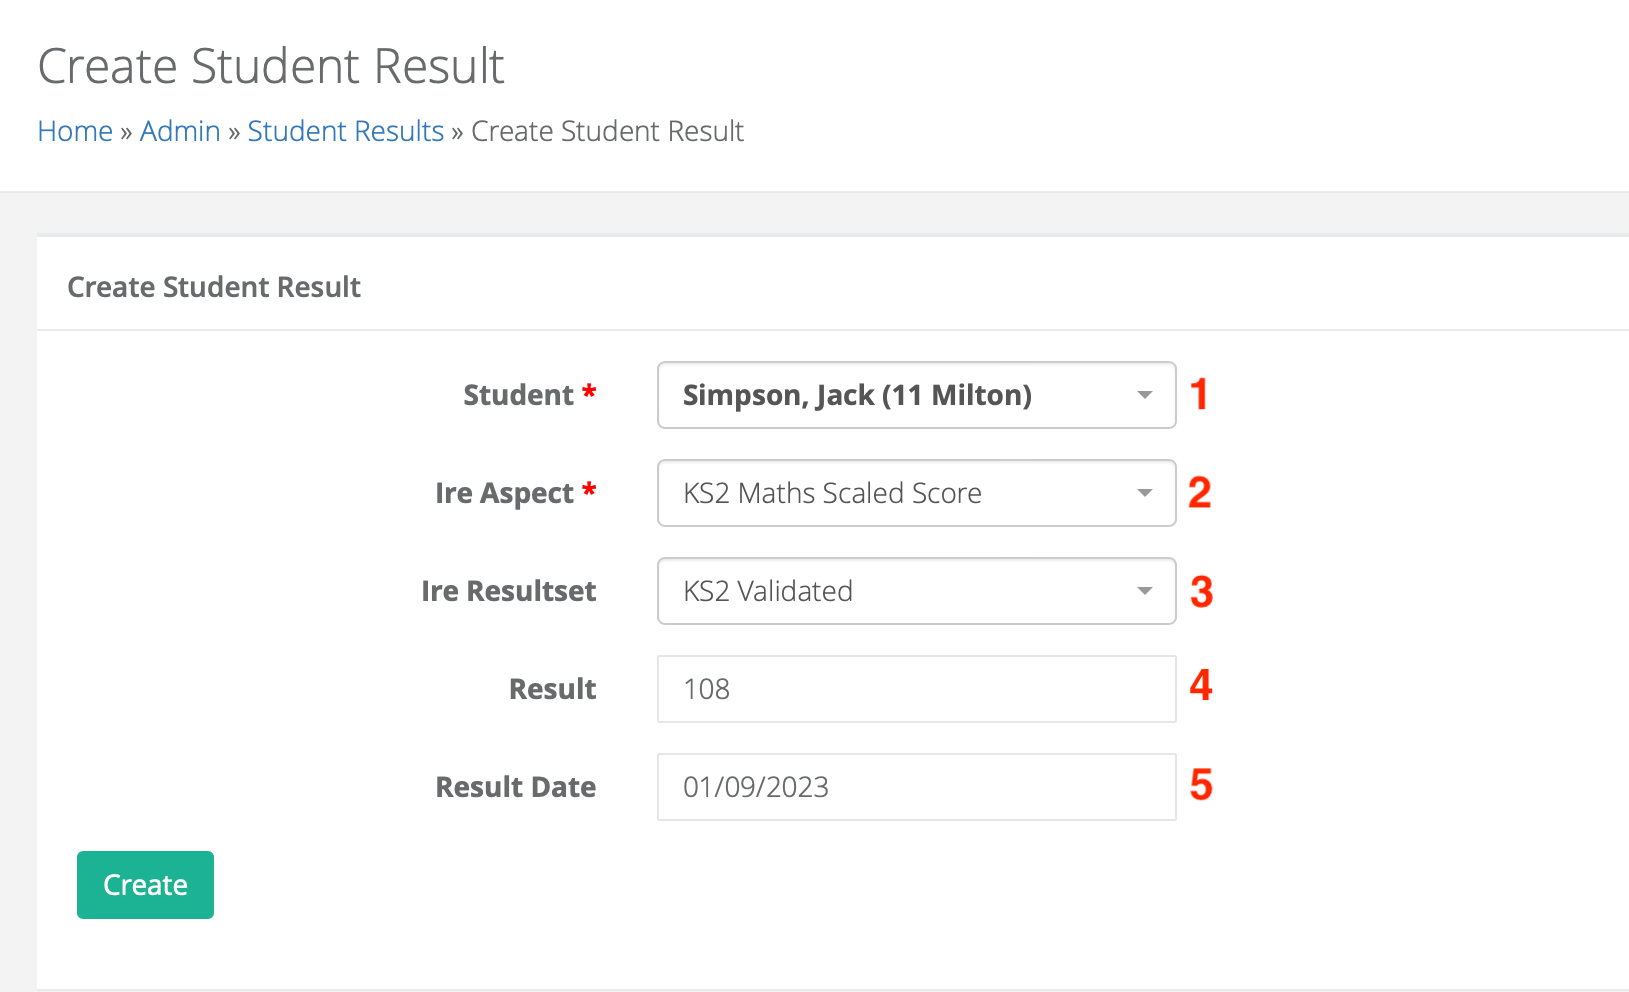
Now click on 'Create'. Don't forget to repeat the process for both Maths scaled score and Reading scaled score aspects.
After adding new KS2 data for either individual students or groups of students, always re-calculate the KS2 values by navigating to Admin > Progress > Student KS2 Values then click on the 'Re-calculate KS2 Values' button

Generating new targets
Navigate to the page Admin > Progress > Targets
Step 1 - adding a target set
Create a target set for the current academic year by clicking on 'Add target set'.
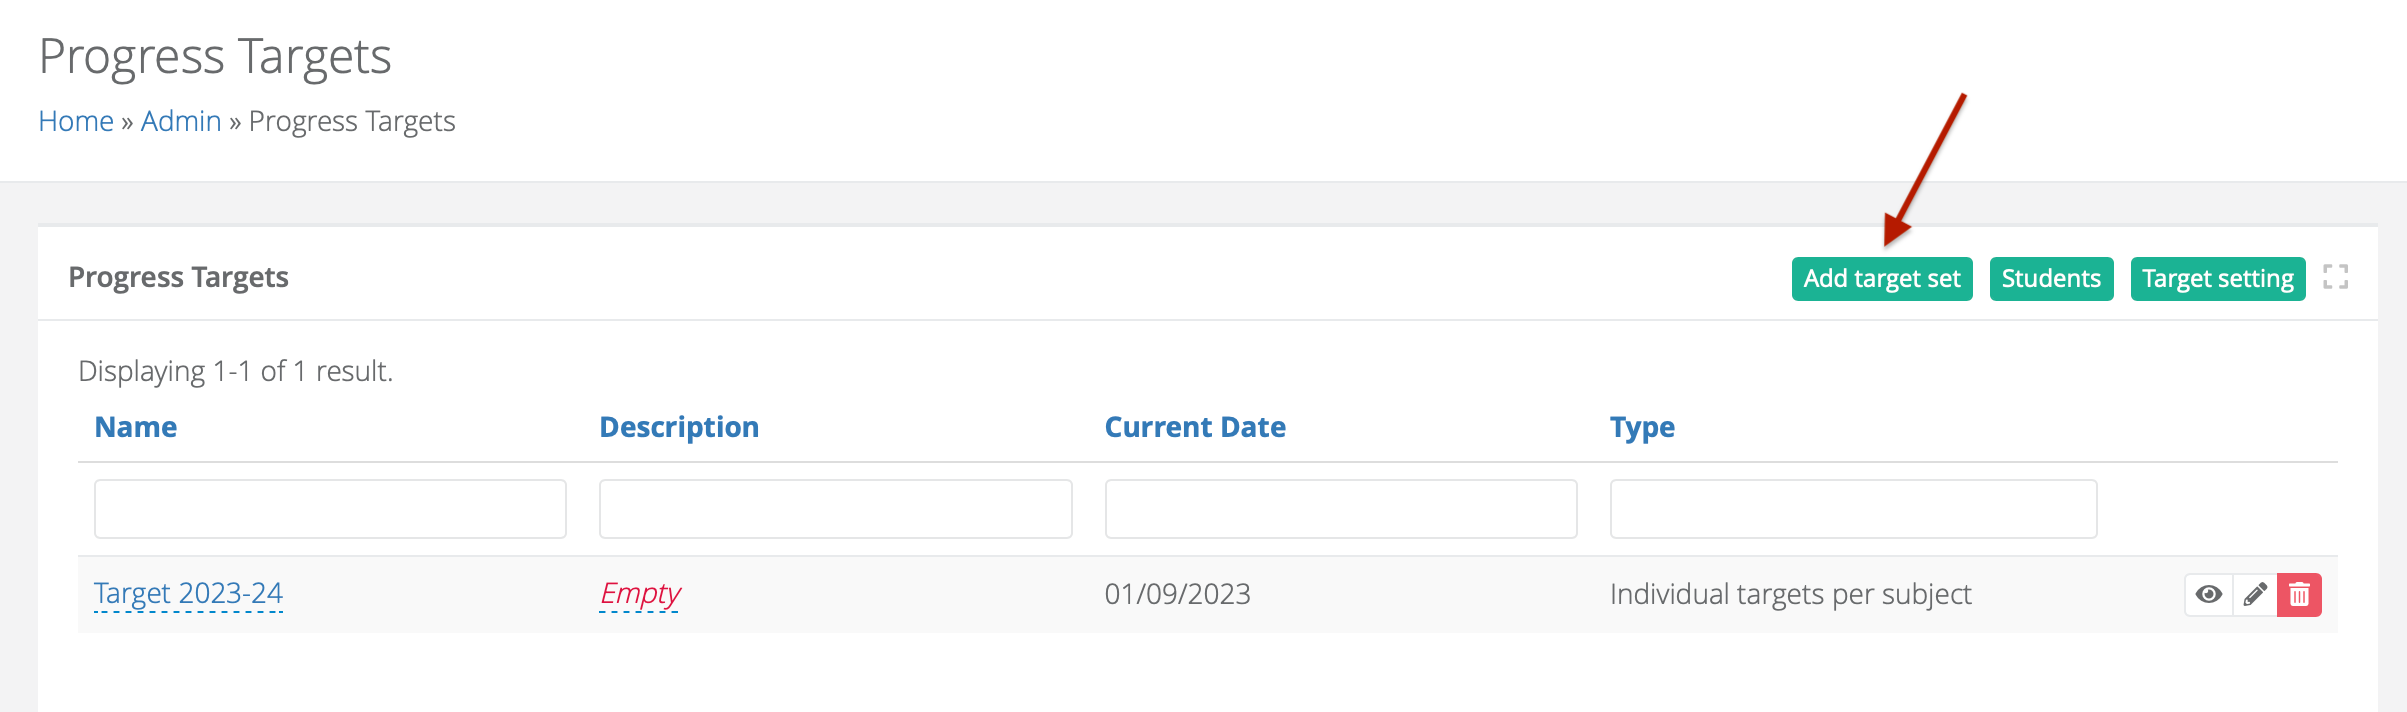
Complete the fields with the following information:
- The name of the target group set - we would recommend calling each set by the name of the academic year, e.g 'Target 2023-24'
- In the 'Current Date' field, enter the start date of the current academic year, e.g. 01/09/2023
- Select from the two options:
- 'Same target for all subjects'
- 'Individual targets per subject'
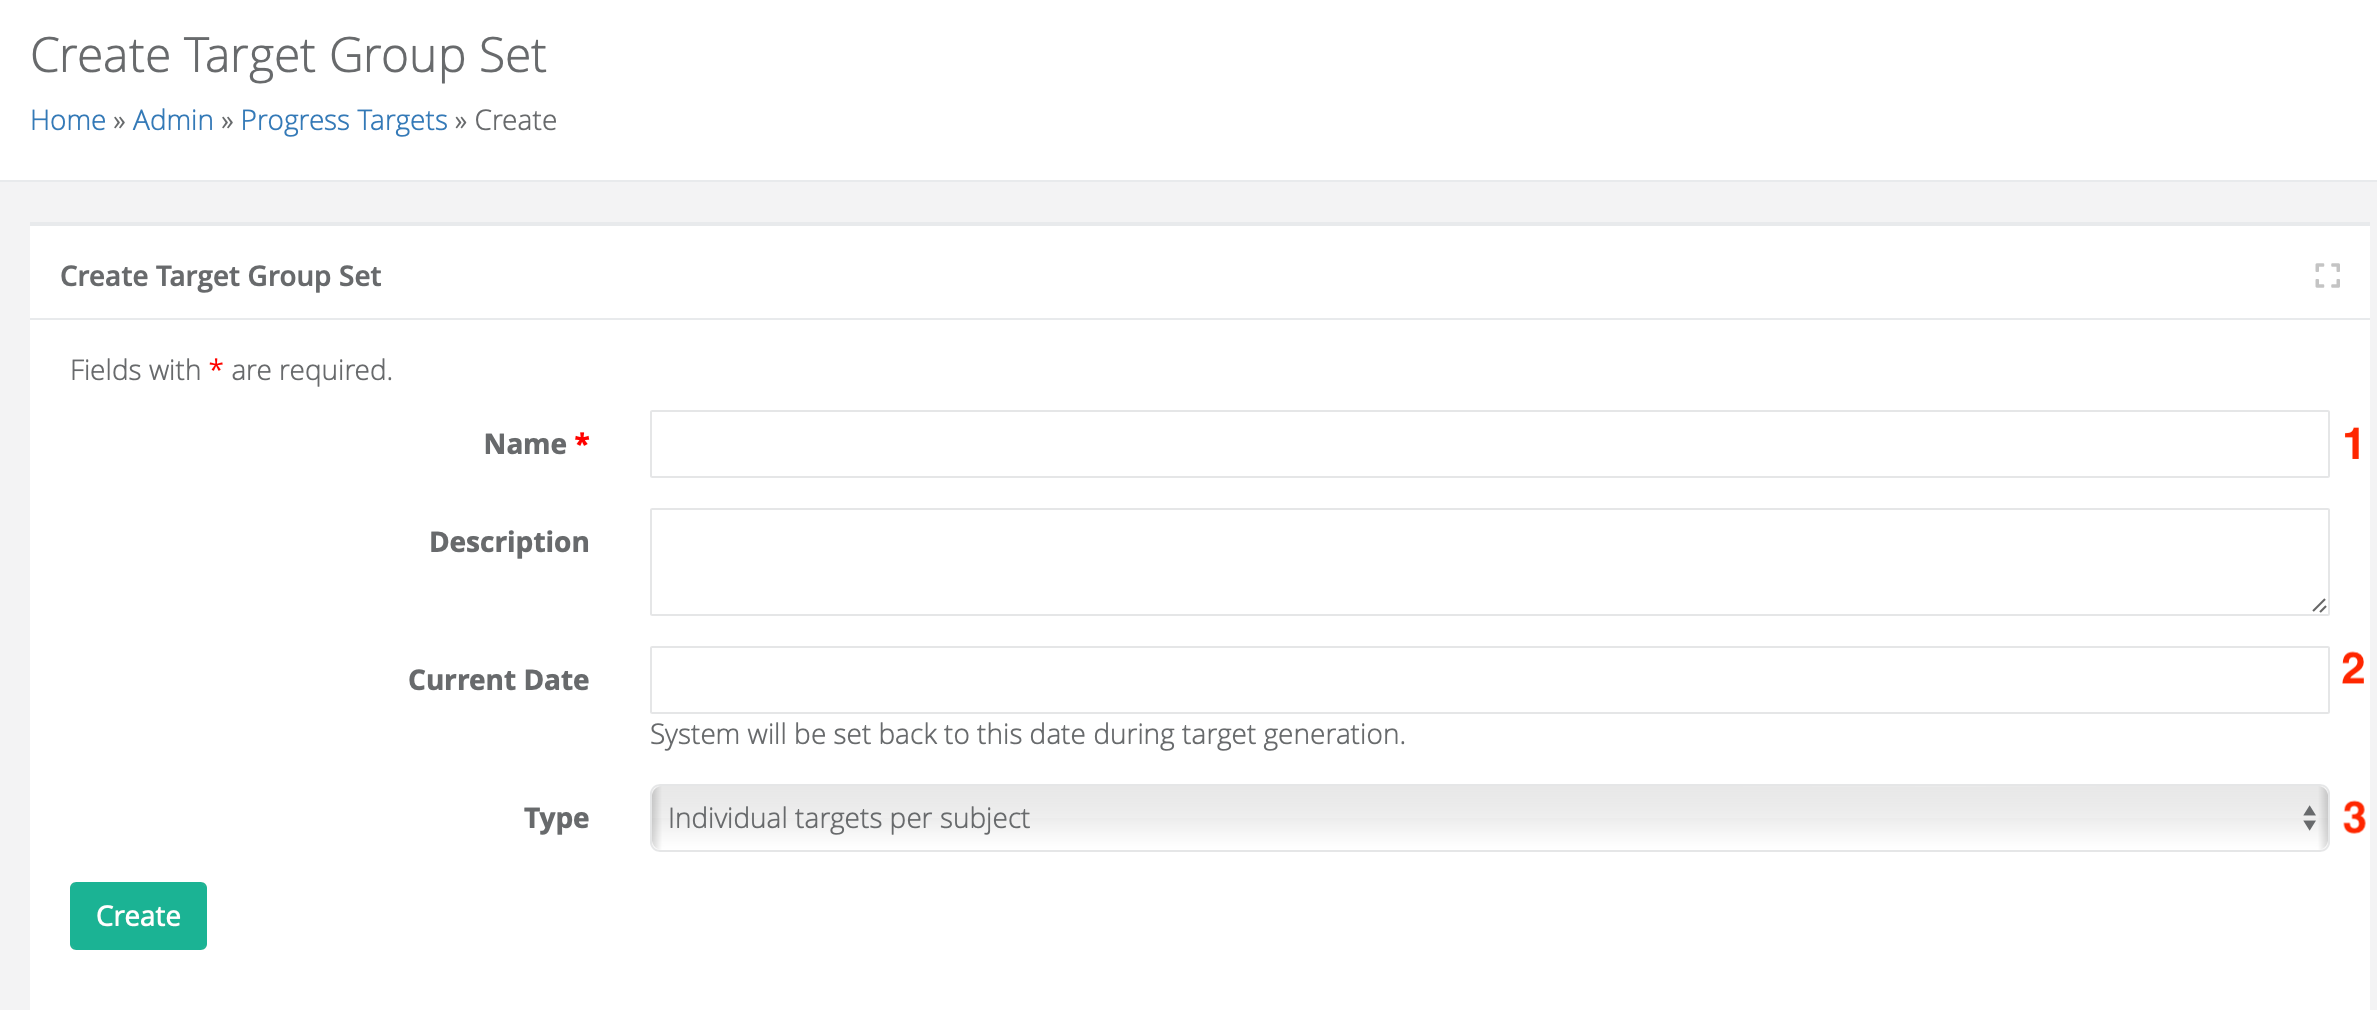
Now click on 'Create'.
After adding any new Key Stage 2 data for either individual students or groups of students, navigate to Admin > Progress > Student KS2 Values then click on the 'Re-calculate KS2 Values button

Step 2 - selecting the 'Group' type
In the new target set you have created, click on the eye icon.
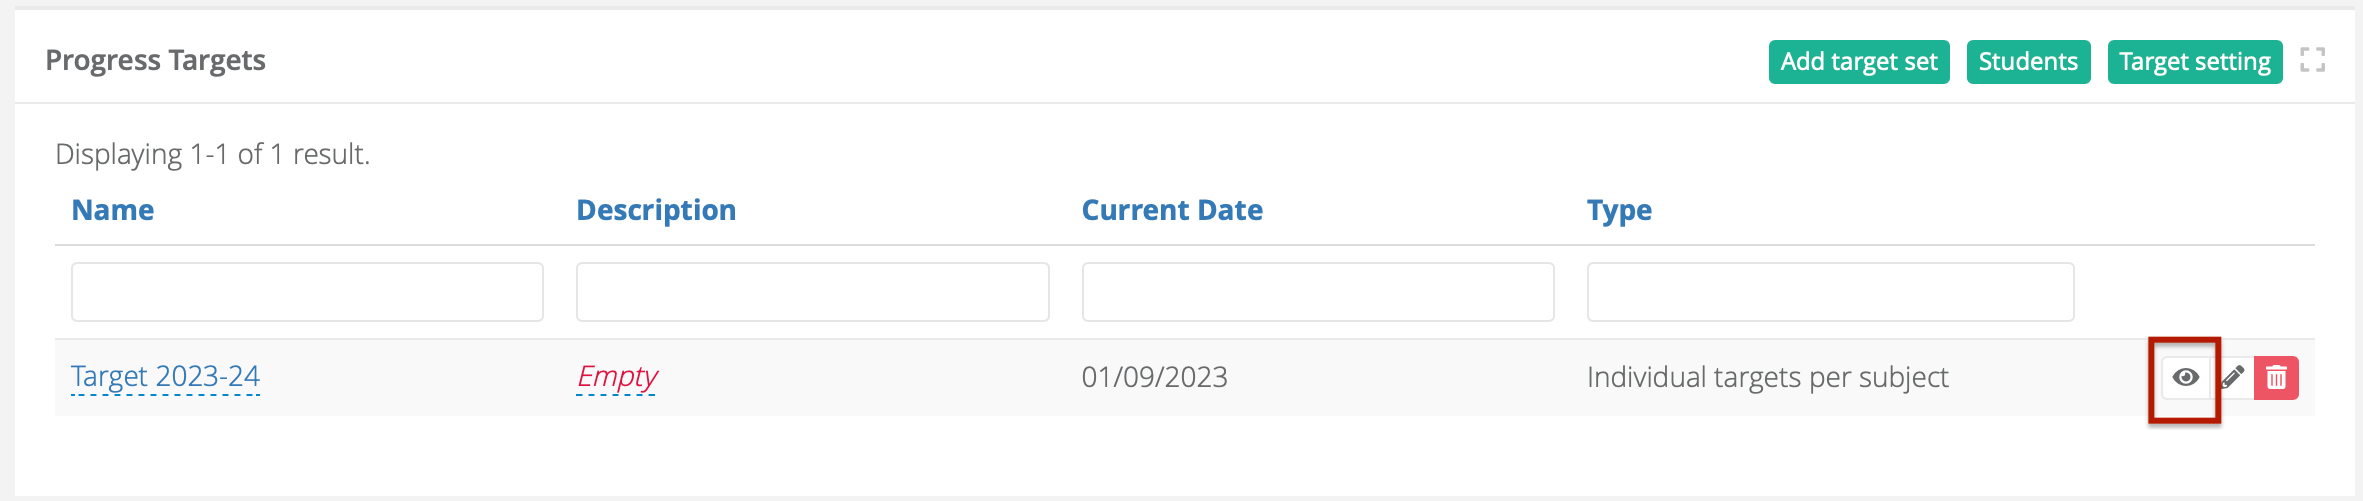
Select from one of the two target setting 'Group' options from this page:
- Click on 'Initialize Single Group (60 - 121)' to apply the same target setting methodology to all ability bands
- Click on 'Initialize Three Group (L 60 - 99.5, M 100 - 109.5, H 110 - 121)' to apply different target setting methodology to different prior attainment bands

These are the default options, but any number of groups can be created by clicking on the 'Add target group' button in order to provide students with appropriate targets.
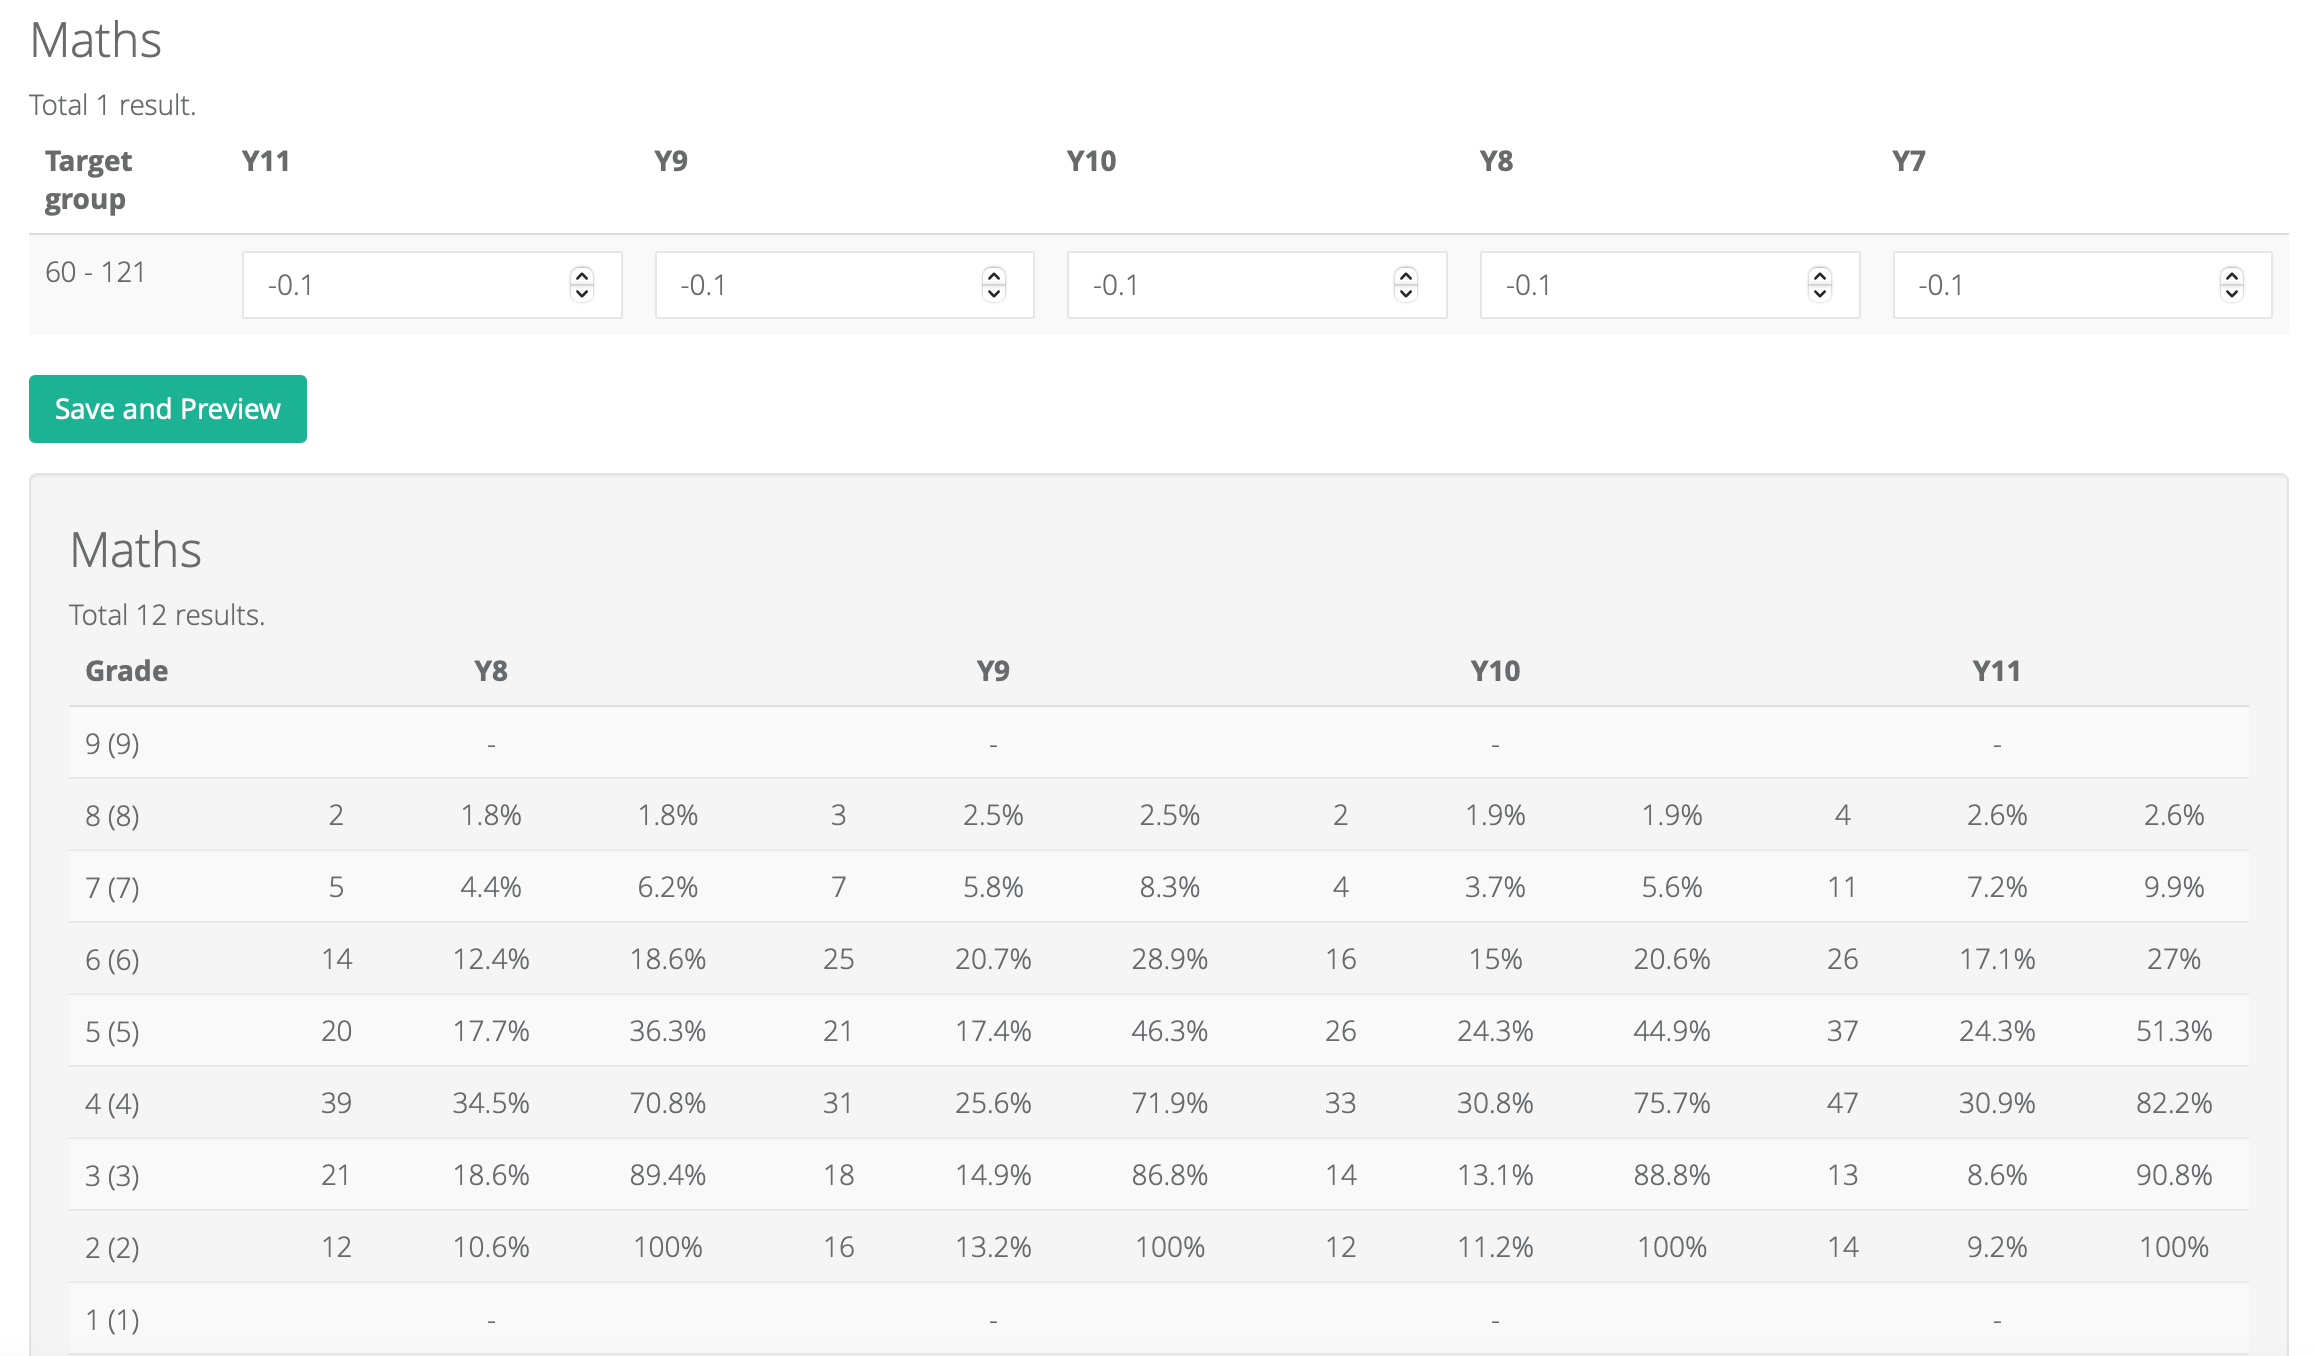
Step 3 - deciding on the level of challenge
The 'Target Groups' feature allows you to set targets flexibly either for all subjects or for individual subjects (as described in Step 1 above) and for each group. For each student's grade, the platform will take the national expectation, add or subtract the amount you specify, then round up to the nearest whole grade. Here is an example based on the 'Individual targets per subject' option:
- The same figure has been entered for all year groups in each subject however different figures can be entered for different cohorts if desired
- Different figures have been entered for Maths, English and Science, as it may be appropriate to set different levels of challenge for different subject teams

It is worth noting that entering a figure of -0.5 in any box will give you a value added score of around 0.
Step 4 - previewing targets
To preview the targets at individual subject level, click on the 'Save and Preview' button. You can adjust your targets if you wish, then click on 'Save and Preview' again. This process can be undertaken repeatedly until you are happy with the outcome.
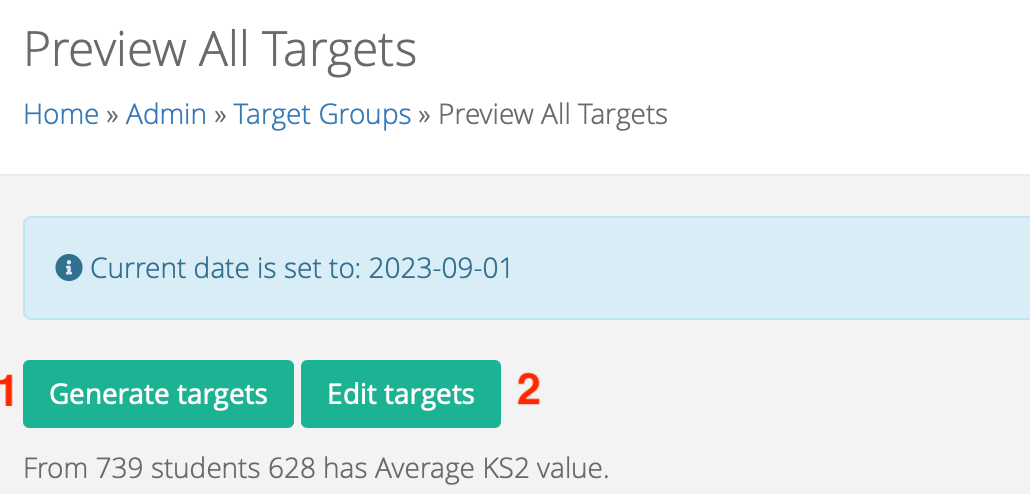
Step 5 - generating targets
Once you are happy with your targets for all subjects, click on the 'Preview All Targets' button.

- Do a final check of the targets, then click on the 'Generate Targets' button.
- Note that at this stage, you still have the option to go back and edit your targets.
On the 'Generate Targets' page, there are options to generate targets for:
- all year groups or just one selected year group
- students without targets or, if the 'Only for students without targets' box is unticked, all students, even if they have pre-existing targets. This feature is particularly useful if you are generating targets for individual or small groups of students and do not wish to override other students' existing targets.
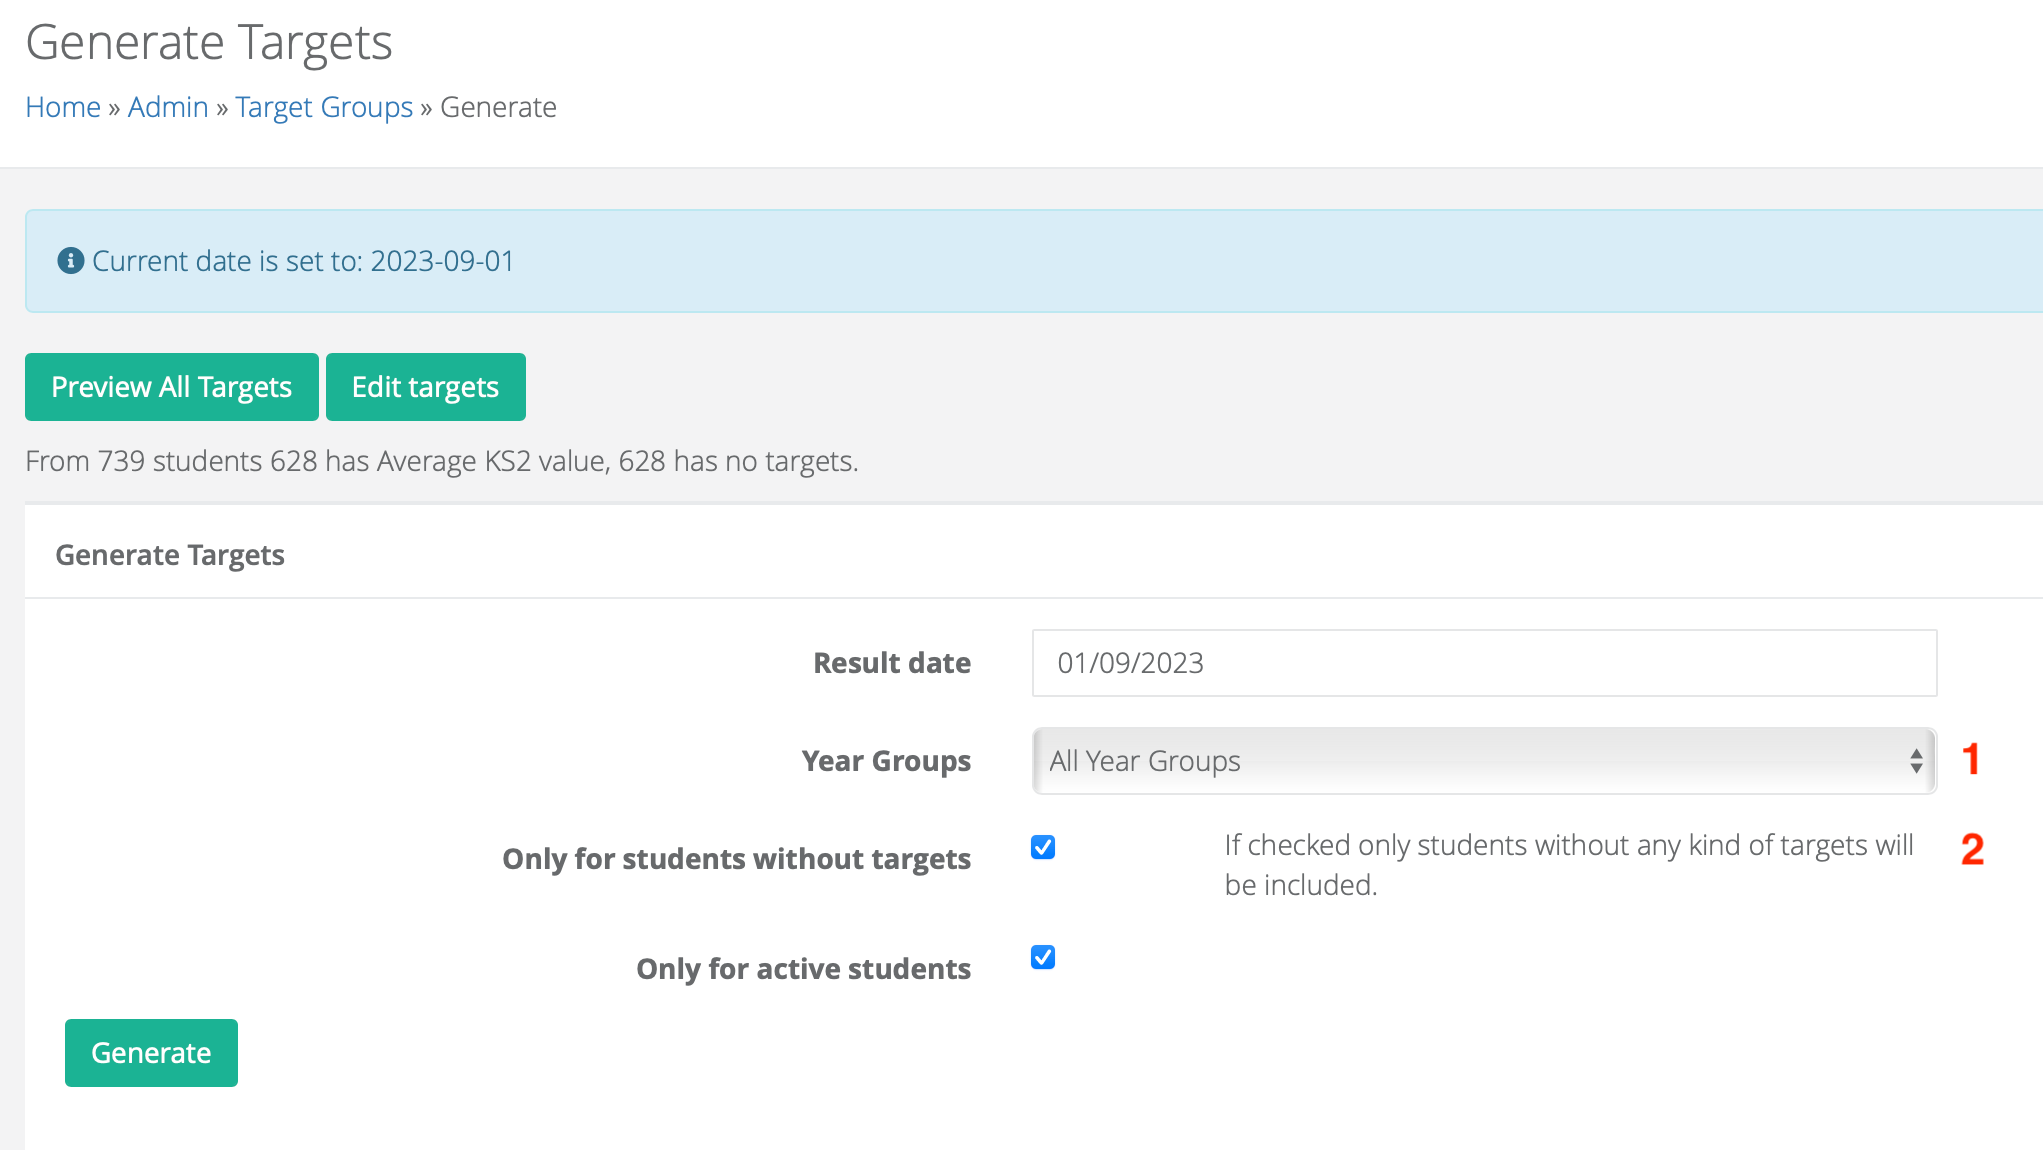
Once you have selected your preferred options, click on 'Generate'.
Step 6 - exporting targets
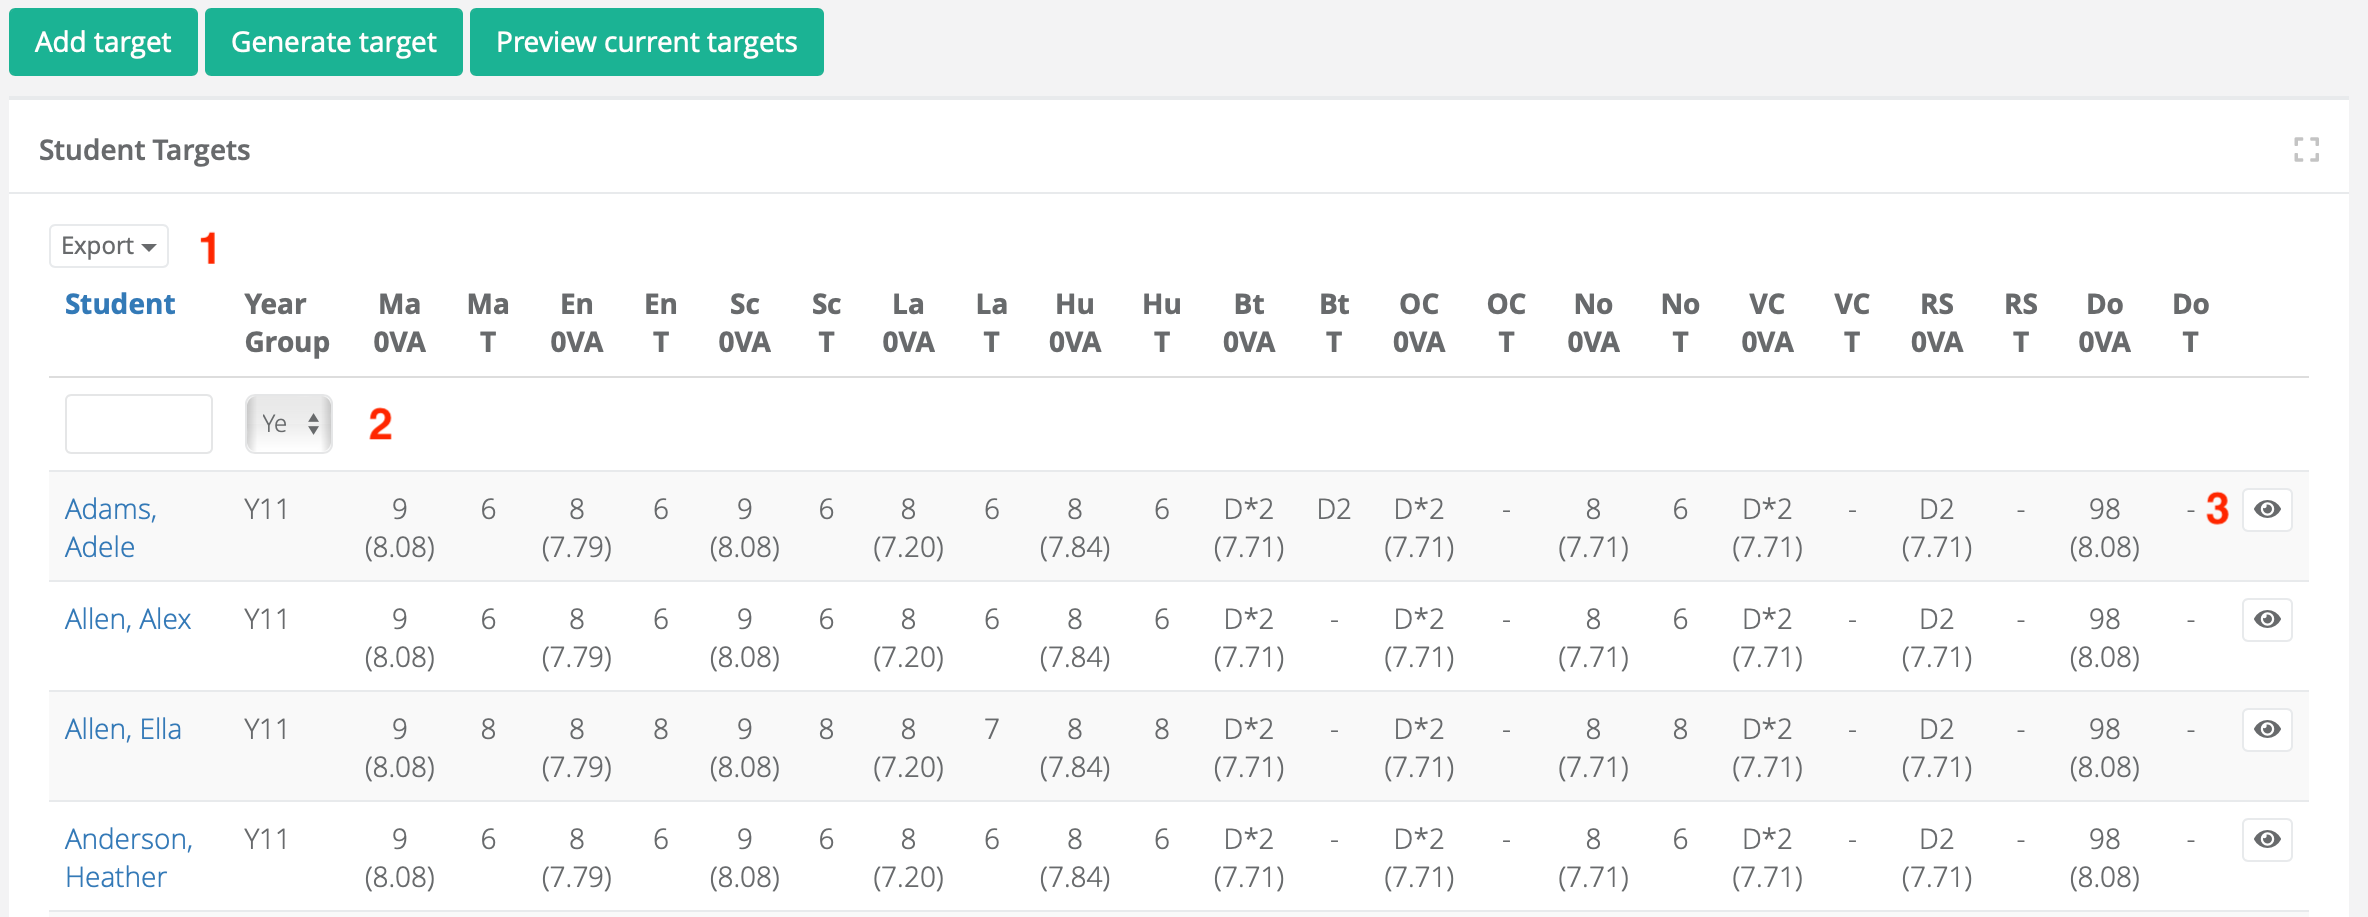
The targets that have been generated can be viewed and exported by navigating back to Admin > Progress > Targets then clicking on the 'Students' button.
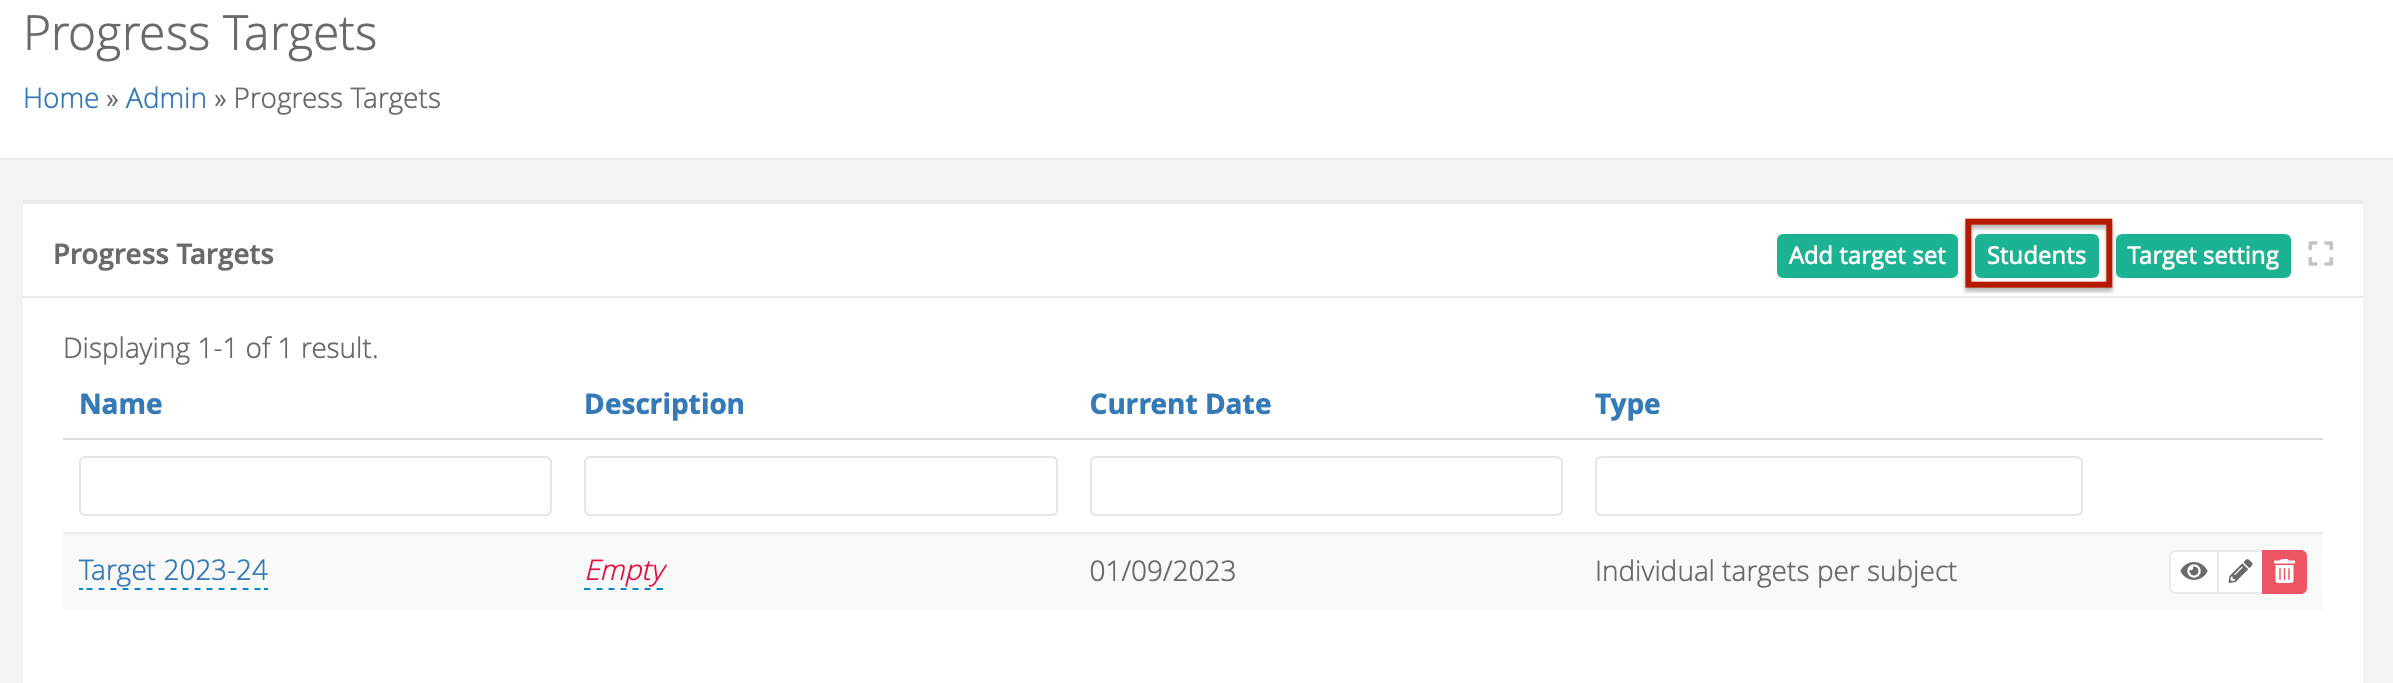
From the 'Student Targets' page, it is possible to:
- Export all students' targets
- Filter for one year group's targets
- View an individual student's targets by clicking on the eye icon
Was this article helpful?