- 3 Minutes to read
- Print
- DarkLight
- PDF
Uploading and Publishing EYFS GLD Data
- 3 Minutes to read
- Print
- DarkLight
- PDF
Primary schools are able to upload their end of year statutory data for EYFS into the ProgressTeaching platform.
Uploading EYFS 'Good Level of Development' (GLD) data
In order to upload end of Reception EYFS GLD data, you will need the primary 'Prior Data Import Template' spreadsheet. A copy is available in the attachments list on this article.
Step 1 - Spreadsheet preparation
The spreadsheet is laid out as follows:

- On each 'Primary Prior Data' tab, you will see that 6 rows have been populated at the top of the page
- The first 3 rows (Aspect, Result set and Date) are required for your data to import into the ProgressTeaching platform and they identify the type of data you are importing.
- The 'Grade set' row lists the required grade set for the aspect in that particular column. It is possible to switch between grade sets if you wish to do so. For each of the individual EYFS strands, there is the option to use:
- The EYFS_2021 grade set: Wa / Wt / NE
- The EYFS_Strands_2021 grade set: GDS / EXS / WTS / PYG / Ne
- To confirm which grade set your school or trust is using for the EYFS strands, navigate to Admin > Markbooks > Internal Aspects then paste this aspect Cl_Lu_YR_Ou_Rs into the 'Name' column on the page. Look across to the 'Ire Gradeset' column to see which grade set is being used for the individual GLD strands.

The fifth and sixth rows on the spreadsheet are for your reference so you can clearly identify what information is required in each column.
Now paste your pupils' GLD data into the second tab on the spreadsheet using the correct grade set and rename the tab 'EYFS GLD Data' or similar. You will see that each cell has a dropdown list to show the possible grades for the gradeset selected. The grades you paste onto the spreadsheet will need to match this.
Note that the UPN (Unique Pupil Number) in column A is mandatory, so if any UPNs are missing or incorrect, the data will not import.
Once all your data is in the spreadsheet, copy the whole sheet and paste the values only into a blank excel document. You paste values by right clicking, select 'paste special' and 'values'.

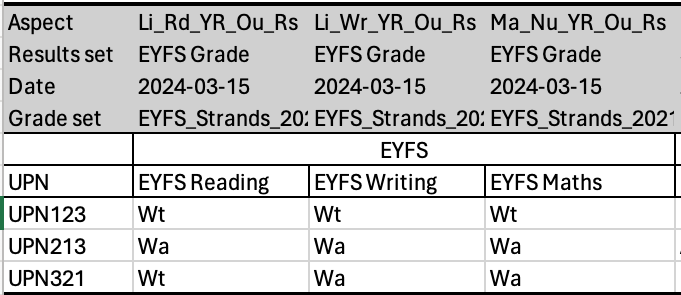
Delete rows 4-6, leaving only the aspect in row 1, result set in row 2, date in row 3 and then your pupils' data in all subsequent rows. Also delete the words 'Aspect', 'Results set', 'Date' and 'Grade set' in cells A1 to A4. Your spreadsheet should now look like this:

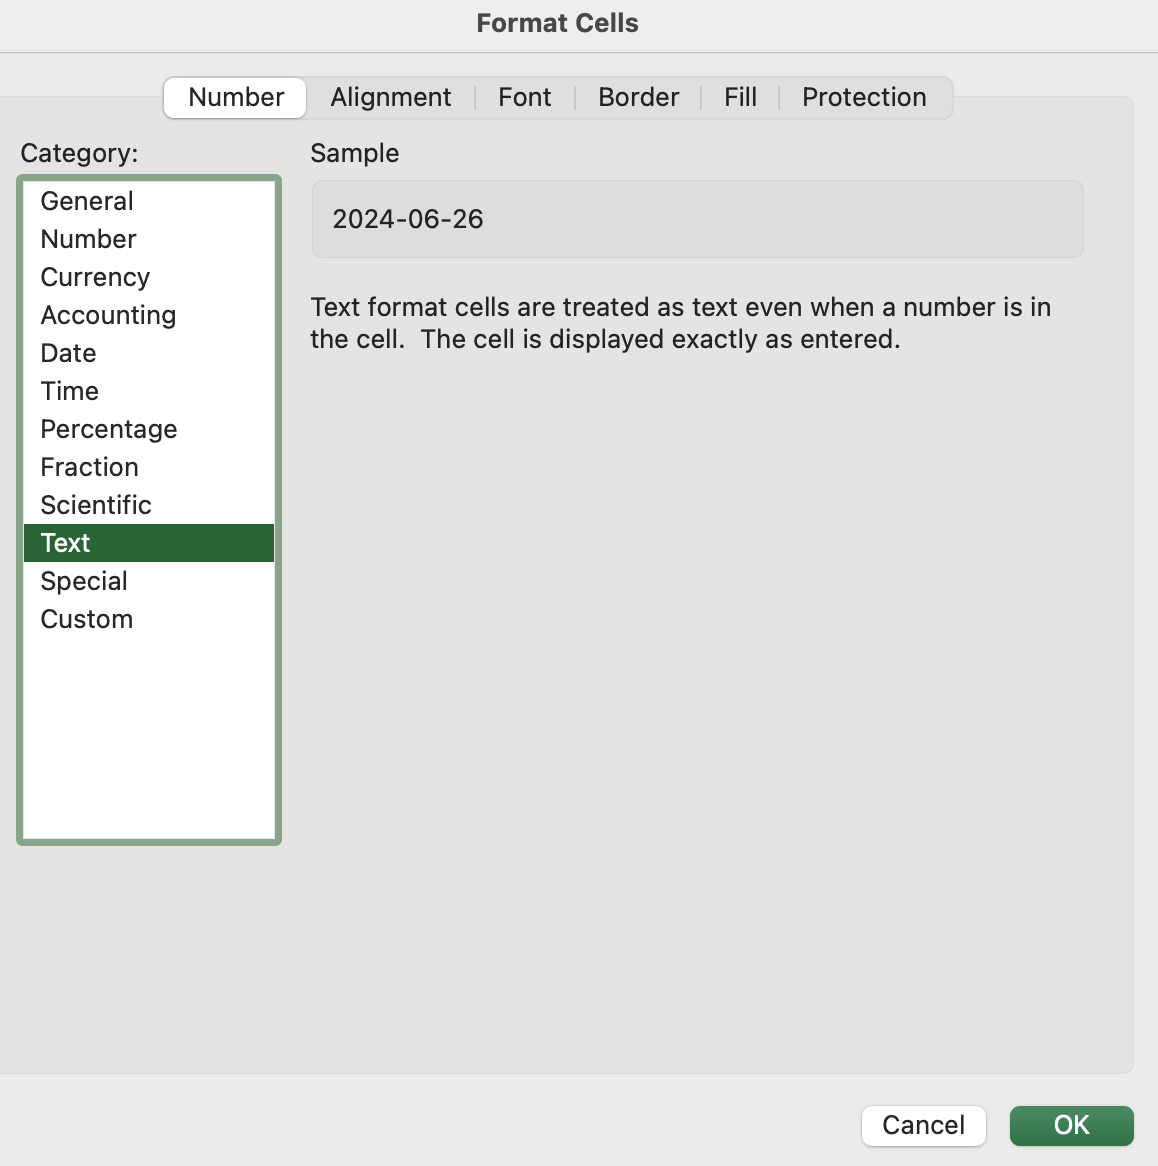
- In the date row (row three), format the cell as text by right clicking the cell, choosing Format Cells... and then in the Number menu setting the Category to Text and click OK. Next change the date so that it is relevant to your upload date. The format must be YYYY-MM-DD, for example 2024-06-26.

Step 2 - importing your data
Navigate to Admin > Progress > Student Result then select the 'Import V2' button towards the top right-hand corner of the screen.

Click on 'Browse' then upload your file.
Step 3 - publishing your data
Navigate to Admin > Assessment Terms then filter the 'Term' column for 'EYFS Grade' or in some older instances this will be 'EYFS'.

Publish the data as you would any other assessment term. A full explanation of how to publish data is available in this Knowledge Base article.
Step 4 - checking your data analysis
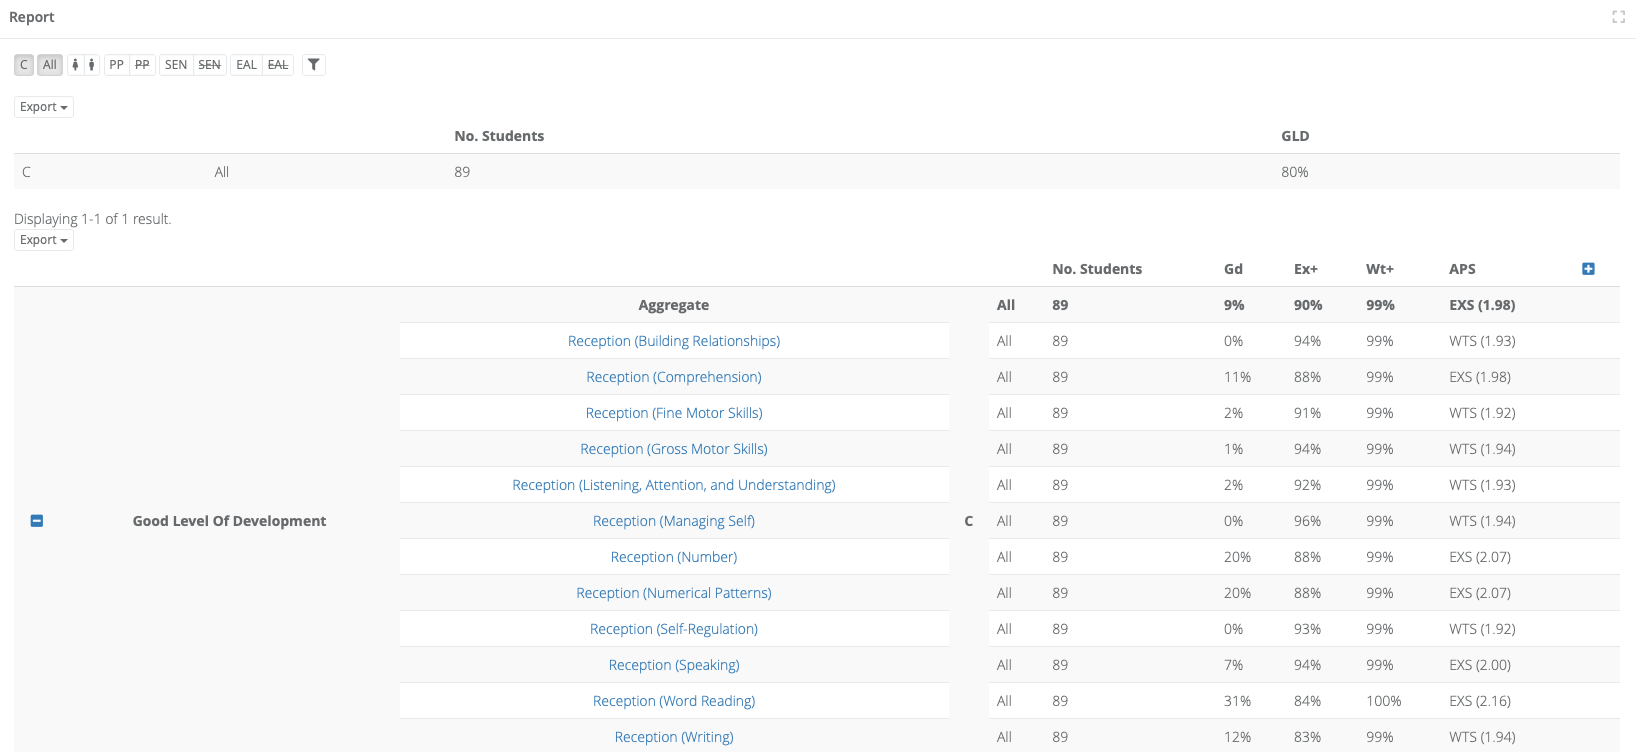
As soon as the data has finished publishing, it will be ready for you to view in the assessment term 'EYFS Grade' or 'EYFS' for older instances. The data can be viewed on the Year Group page by navigating to Year Groups > Reception or whatever your naming convention is for the year group.

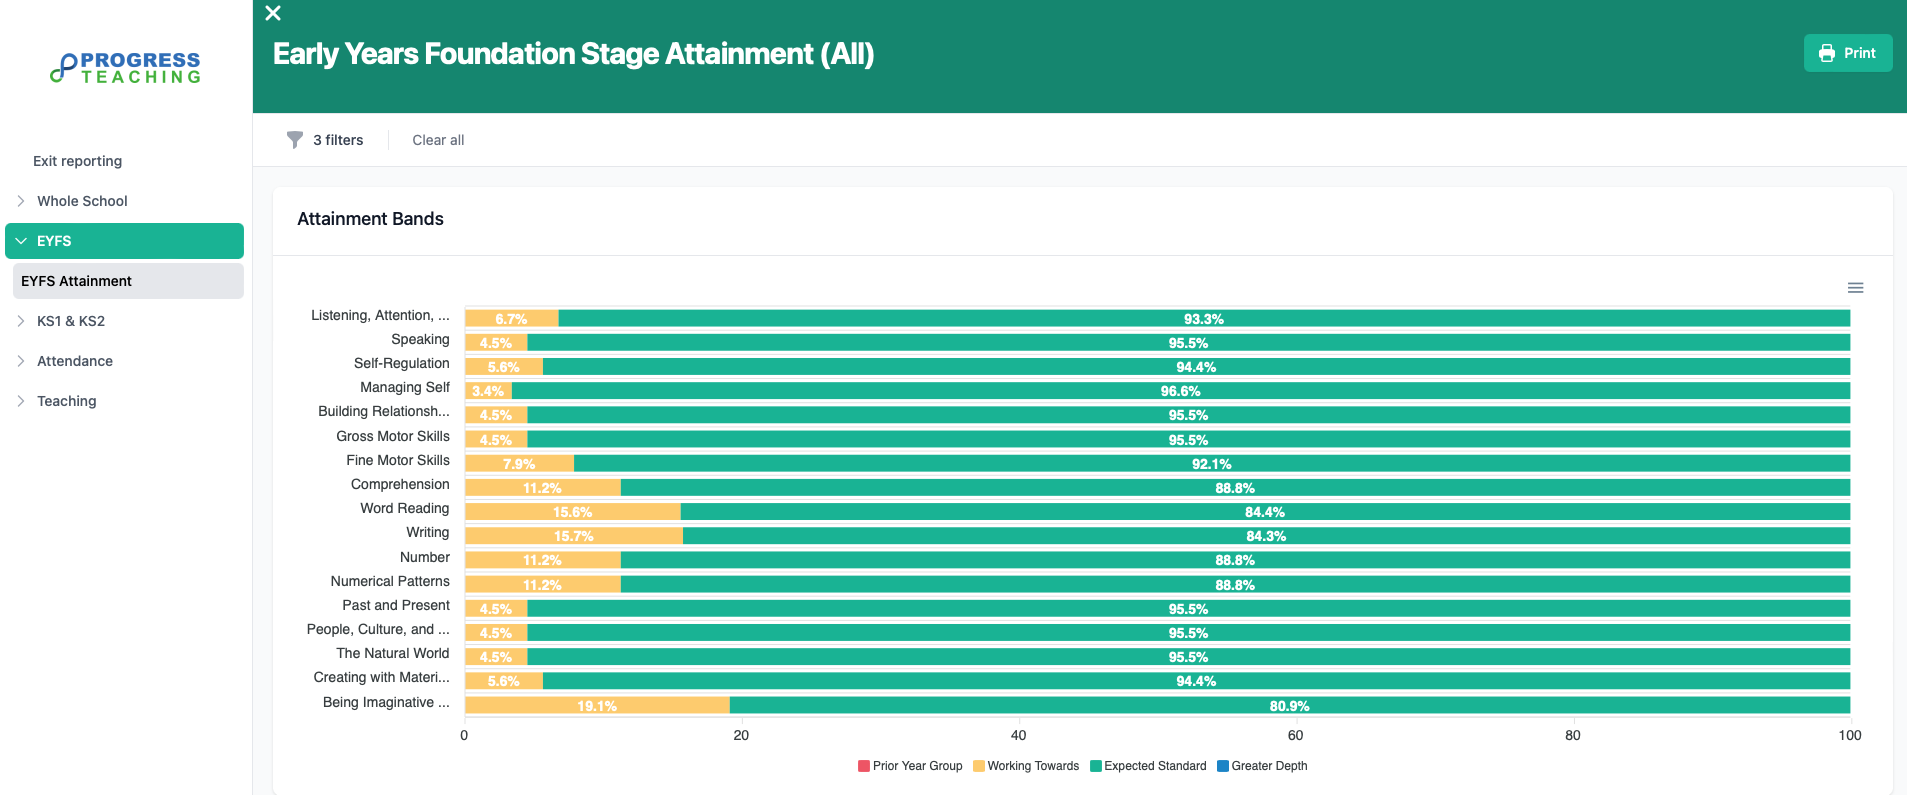
Your data can also be viewed in the 'Reporting' area of the platform by navigating to Reports > EYFS > EYFS Attainment


